For some lifters, nothing compares to the upper-body pump they experience after a high-intensity chest workout. Many gym enthusiasts focus heavily on the bench press to build a bigger, more muscular chest but often overlook the power of mastering the simple yet highly effective bodyweight dip.
This staple movement isn’t reserved for gymnasts or calisthenics practitioners; it’s a timeless exercise used by bodybuilders and strength athletes for decades. Dips are an old-school favorite that can build impressive chest strength and size.
Incorporating dips into your routine will target your pectorals, triceps, and shoulders, contributing to a fuller, more powerful upper body. Here’s how to use nothing but your body weight to achieve a deep burn and explosive chest pump.
How to Do Dips
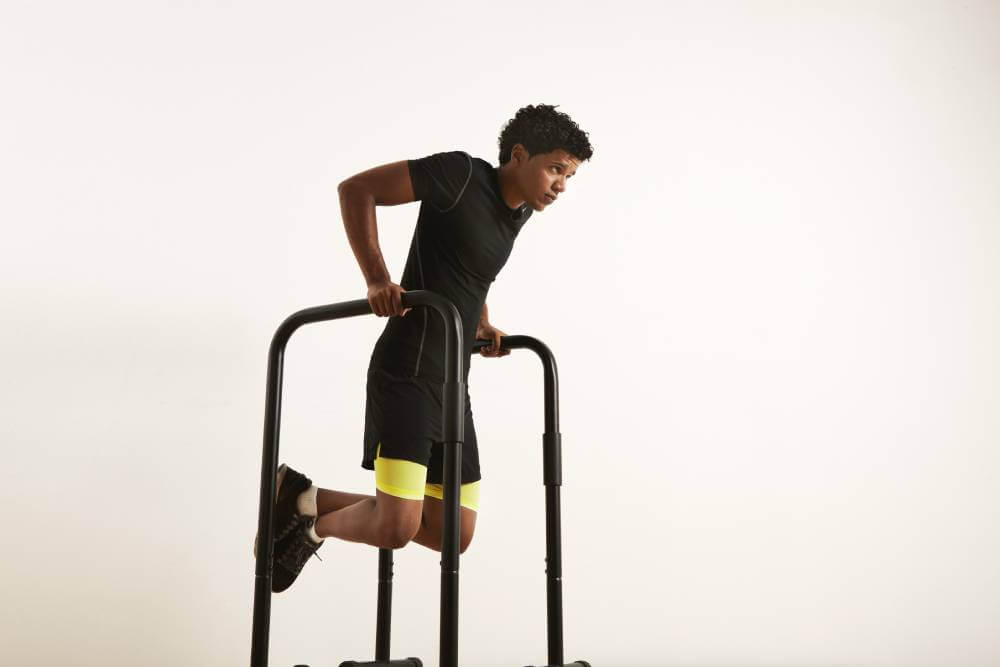
Dips are a versatile bodyweight exercise that can be performed using dedicated dip bars, an assisted dip station, or even a sturdy pair of chairs. Regardless of your setup, the key is ensuring that it’s at a height that allows you to keep your legs and feet off the ground when in the bottom (stretched) position. This setup ensures that you can move through a full range of motion, maximizing the effectiveness of the exercise.
Step 1 — Get Up on the Bars
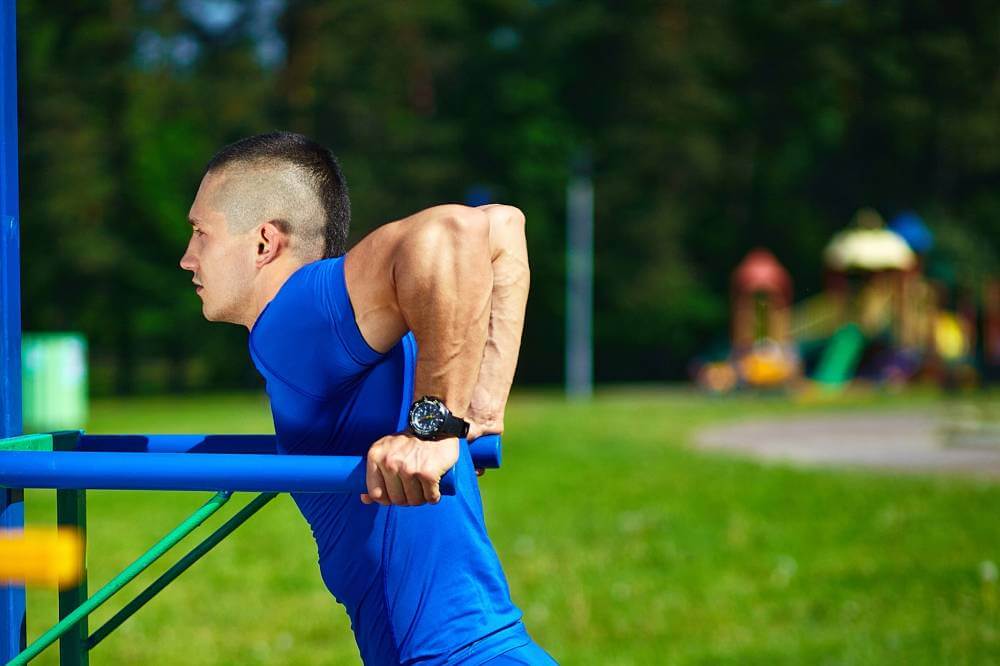
Approach the dip station and grab the bars with your palms facing inward. Your arms should be fully extended—if necessary, you may need to jump slightly to get into the locked-out position. Once in position, bend your legs somewhat so your arms support your total body weight.
Maintain a straight back with your head looking forward. To keep your entire body tight, engage your core and squeeze your glutes. This helps stabilize your form and keeps you in control throughout the movement.
Form Tip:
Ensure your hands are roughly shoulder-width apart. Many dip bars are angled, offering different grip options, but a wider grip may increase strain on your shoulder joints and reduce tension on your chest muscles.
Step 2 — Lower into a Stretch
Slowly lower your body by bending your elbows until they reach approximately 90-degree angles, if your mobility permits. Keep your head looking forward, but allow your upper body to lean slightly forward to better engage the chest muscles.
Your elbows should naturally angle slightly outwards as you descend. However, avoid excessively flaring them out to the sides, as this can put undue strain on your shoulder joints.
Form Tip:
Control the descent slowly, enhancing muscle tension and promoting muscle growth. Aim for about three seconds to reach the bottom position, ensuring complete control throughout the movement. This slow tempo maximizes the effectiveness of the stretch and engagement of the chest and triceps.
Step 3 — Drive Up to Full Contraction
Push your body upwards in a controlled and smooth motion. Stop once you’ve returned to the starting position with your arms nearly straight (but not locked). Briefly pause at the top to stabilize your body and prevent any swinging.
As you rise, focus on maintaining constant tension in your chest muscles. Engage your mind-muscle connection by concentrating on your pecs and visualizing the muscle fibers contracting and working throughout the movement.
Form Tip:
Your body’s upward path should mirror the descent. As you lower, your head and shoulders should naturally move slightly in front of your hands. As you press up, your upper body should return to a fully stacked position with your elbows aligned above your wrists for optimal control and stability.
Dip Mistakes to Dodge
Dips are a powerful bodyweight exercise for building strength and size in your chest, arms, and shoulders. However, improper form can lead to ineffective results or injury—especially to the delicate rotator cuff tendons. Thankfully, the most common mistakes are easy to correct with mindful practice.
Locking Your Elbows (Extended)
At the top of the dip movement, avoiding locking your elbows into an entirely straight, rigid position is essential. Many lifters make the mistake of snapping their elbows into full extension, believing that reaching this position is necessary for completing the rep. However, locking your elbows can take tension off the working muscles—especially the chest and triceps—and place unnecessary stress on your joints, specifically your elbows and shoulders.
Instead, focus on maintaining a slight bend in your arms. This helps keep your muscles under constant tension rather than your joints, which is crucial for muscle hypertrophy and strength gains. When you stop just short of locking out your elbows, you force your triceps, chest, and shoulders to stay engaged throughout the entire movement. This approach is especially beneficial for bodyweight exercises like dips, where the goal is moving from point A to point B and maximizing the muscular effort through every inch of the exercise.
How to Maintain Proper Form:
Controlled Movement: As you approach the top of the dip, instead of snapping into full extension, consciously stop just before lockout. This slight bend keeps the tension on your muscles while allowing for a smoother, more fluid transition between the movement’s concentric (lifting) and eccentric (lowering) phases.
Mind-Muscle Focus: Pay attention to how your chest and triceps feel at the top of the movement. Instead of finishing the rep quickly, concentrate on the contraction of your chest muscles and your triceps’ role in supporting the movement. This focus helps you avoid falling into the habit of using momentum or sloppy form, which can compromise your results.
Gradual Progression: If you’re new to dips or working on building endurance, it’s easy to fall into the trap of using momentum or locking out your elbows to complete more reps. Instead, aim for quality over quantity. Performing fewer reps with excellent form is far more effective for building strength and size than rushing through more reps with compromised technique.
Avoiding the Lockout in Practice:
To actively avoid locking your elbows, try these practical tips:
Visualize the Bend: As you press up, think of stopping before your elbows reach a fully straight position. Visualize the slight bend in your arms that will keep your muscles engaged.
Use a Tempo Count: Incorporate a tempo count into your reps to ensure you’re not rushing through the movement. For example, aim for a 2-second push on the way up and a 3-second controlled descent. This slower tempo will naturally help you maintain tension and avoid locking out.
Shorten Your Range Slightly: If you tend to lock out due to habit, practice slightly shortening your range of motion. Focus on making the top position tight and controlled without reaching full extension.
Dipping Too Low
The bottom, stretched position of dips is where your shoulder joints are under the most potential stress. While depth is vital for full muscle engagement, going too low can strain your shoulders excessively, particularly your rotator cuffs and other surrounding structures. It’s crucial to find the balance between a deep stretch for muscle activation and maintaining joint safety.
When you go too low in dips—significantly beyond the point where your shoulders feel a natural stretch—it can lead to overextension of the shoulder joint, increasing the risk of injury. This can cause long-term wear and tear on the joints, so paying close attention to your depth and form during dips is significant.
How to Avoid Dipping Too Low:
Listen to Your Body: Pay attention to the stretch in your chest and shoulders as you lower yourself. You should feel a natural, controlled stretch without discomfort or sharp pain. If you feel any excessive pulling or pressure in your shoulders, you’ve likely gone too low.
Stop Around 90 Degrees: A good rule of thumb is to stop your descent when your elbows reach a 90-degree bend or when your upper arms are parallel to the floor. For many lifters, this provides enough range of motion to effectively engage the chest and triceps without putting the shoulders at risk.
Use a Mirror or Training Partner: If possible, perform dips in front of a mirror to monitor your form. Watching how low your elbows go will help you maintain a safe and effective range of motion. Alternatively, having a training partner gives you feedback on your depth to ensure you’re not dropping too far.
Don’t Let Ego Dictate Depth: One of the common pitfalls is trying to force a deeper range of motion in pursuit of more intensity or more reps. Remember, form is king, and using an excessive range of motion doesn’t equate to better results—it often leads to compromised form and potential injury.
Controlled Movement: Lower your body slowly and with control, using a tempo that allows you to stop at the proper depth. Quick, uncontrolled movements often lead to dropping too low or bouncing at the bottom, exacerbating joint strain.
Form Tip:
If you struggle to maintain proper depth without dipping too low, focus on strengthening your chest, shoulders, and triceps with supplementary exercises (such as push-ups and dumbbell presses) before progressing to deeper dips.
Benefits of Dips
Dips are a highly effective bodyweight exercise that can deliver many benefits, particularly for those looking to build muscle mass and strength in their upper body. They target key muscle groups like the chest, shoulders, and triceps while also enhancing core stabilization and promoting overall functional fitness. Mastering dips can complement your overall strength training routine and provide numerous physical advantages.
Increased Muscle Mass and Strength
Dips are an incredibly effective exercise for stimulating muscle growth and building strength in key upper body muscles, especially your pectorals (chest muscles), triceps, and core. The movement involves a full range of motion that stretches and contracts the chest, creating significant tension and promoting hypertrophy. This deep muscle activation helps maximize chest development while targeting your triceps and core for overall upper-body growth.
When performing dips, the stretch at the bottom of the movement followed by the upward push works the entire chest muscle, making it a highly efficient exercise for increasing muscle size and strength. As you progress with more reps or add weight, the muscle fibers adapt and grow stronger, increasing muscle mass.
Comparable to Free Weight Exercises
Research has shown that bodyweight exercises, such as dips, are comparable to free-weight exercises in their ability to build strength. Similar to bench presses or dumbbell presses, dips recruit many muscle fibers and require you to stabilize your body during the movement. This makes dips a powerful exercise for improving overall strength without needing heavy weights or machines.
Moreover, dips allow you to progressively overload by either increasing reps or adding external weight, such as using a weight belt or holding a dumbbell between your feet, further driving muscle and strength gains.
Improved Joint Health
Maintaining muscular balance is crucial for joint stability, overall health, and optimal performance. Bodyweight exercises like dips are an effective way to strengthen muscles that support your joints, helping to prevent injuries and improve long-term joint health.
If your training routine involves many pulling exercises—such as rowing, pull-ups, or activities like combat sports that emphasize pulling movements—it’s crucial to balance these with pushing exercises like dips. This balance helps to build opposing solid muscles (chest, triceps, and shoulders) that counteract the pulling muscles (back and biceps), preventing muscular imbalances. Over time, such imbalances can lead to joint instability and injuries, particularly in the shoulders.
Reducing Injury Risk Through Strength Training
Research shows that just a 10% increase in strength training volume can significantly reduce overall injury risk. Regularly incorporating dips into your routine helps strengthen the muscles around your shoulders, elbows, and wrists, improving their stability and reducing wear and tear. Stronger pushing muscles and balanced pulling muscles contribute to better joint alignment, helping you avoid overuse injuries and enhancing your overall physical performance.
Improved Core Stabilization
Although dips are primarily seen as chest and upper body exercises, they significantly benefit core stabilization. Throughout the movement, your core muscles are engaged to maintain stability in your lower body and support your entire torso. While dips don’t directly target the core like crunches or planks, your core is strongly recruited to help stabilize your body as you lower and press yourself back up.
This total-body stability is essential for coordinated movement and balance, ensuring that your dips remain controlled and efficient. Improved core stability enhances performance during dips and contributes to better posture, balance, and overall strength in various physical activities.
Core Stability and Injury Prevention
A robust and stable core is key to preventing injury, as it provides a solid foundation for all movements. Regularly performing it will improve your body’s ability to stabilize itself, promoting better movement patterns and reducing the risk of injury—especially in exercises or sports that require dynamic movement.
Dip Variations
Dips are a versatile exercise that can be adapted for lifters and athletes of any fitness level. They apply tension to multiple muscle groups, including the chest, triceps, and delts (shoulders). Whether you’re a beginner or more advanced, you can use several variations of dips to build strength and size and improve overall performance. Starting with more manageable versions will help you master form, and as you progress, you can increase intensity and volume to continue challenging your muscles.
Ring Dip
Ring dips are a more advanced dip variation that significantly challenges muscular coordination, balance, and stability. The instability of the rings forces your body to recruit more stabilizer muscles, particularly in the shoulders and upper back, making it an excellent exercise for building not only strength but also improving overall joint stability and control. Additionally, this exercise allows for a more extended range of motion, applying tension to the pecs, triceps, and deltoids, making it a highly effective upper-body workout.
Why Ring Dips Are Effective:
More extended Range of Motion: The instability of the rings forces the muscles to work harder through a deeper range of motion, which increases tension on the pectorals and promotes muscle growth.
Improves Stability and Coordination: Ring dips engage the smaller stabilizing muscles in your shoulders, arms, and core, which helps improve muscular coordination and joint health.
Boosts Shoulder Health: The exercise places significant demand on the rotator cuff and other shoulder stabilizers, making it ideal for strengthening the shoulder girdle and reducing the risk of injury.
Popular in CrossFit and Gymnastics
Ring dips are popular in CrossFit and gymnastic-based programs due to their complexity and the increased demand for upper body stabilizers. The instability of the rings forces athletes to focus on balance and precision, which leads to greater overall upper-body strength and control when appropriately performed.
Form Tips for Ring Dips:
Control and Stability: Focus on keeping the rings close to your body as you lower and press back up. The more control you have, the more efficiently you’ll work on stabilizers.
Engage Your Core: Maintain a tight core throughout the movement to prevent excessive swinging and maintain proper alignment.
Range of Motion: Lower yourself slowly until your upper arms are at or slightly below parallel, then press back up, fully engaging your chest and triceps.
Triceps Dip
The triceps dip is a subtle yet highly effective variation of the traditional dip that focuses on building strength and muscle mass in the triceps rather than the chest. By slightly adjusting your arm and torso position, you can shift the emphasis away from the chest muscles and place greater tension on the triceps, making it a popular exercise for those looking to improve arm strength and definition.
Critical Differences in Triceps Dips:
Upright Torso:
Unlike chest-focused dips, where you lean slightly forward to recruit the chest muscles, in triceps dips, you should maintain a more upright torso throughout the movement. Keeping your body vertical helps reduce the involvement of the chest and maximizes triceps engagement.
Elbow Position:
Perhaps the most crucial adjustment is in your elbow positioning. For triceps dips, keep your elbows tucked close to your body and point them directly toward the wall behind you. This reduces chest involvement and forces the triceps to work harder.
Form tip: Avoid letting your elbows flare outwards, as this can shift tension away from the triceps and place unnecessary strain on the shoulders.
How to Perform Triceps Dips:
Set Up: Begin by gripping the dip bars with your palms facing inward and your arms fully extended. Make sure your torso remains upright, and keep your core engaged.
Lowering Phase: Slowly lower your body, keeping your elbows close to your sides and your torso vertical. Your elbows should point directly behind you as you descend. Lower yourself until your elbows reach a 90-degree bend or as low as your mobility allows while maintaining form.
Press Up: Press your body back up by extending your arms and squeezing your triceps at the movement’s top. Be sure to avoid locking out your elbows completely, as this can reduce the tension on your triceps.
Repeat for Reps: Perform the desired number of repetitions, keeping a controlled and smooth movement throughout.
Form Tips for Triceps Dips:
Maintain Control: Avoid using momentum. Keep the movement slow and controlled to maximize tension on the triceps.
Engage Your Core: A strong core helps maintain proper posture and prevents you from leaning forward.
Avoid Excessive Range: Stop when your elbows are at about 90 degrees. Going lower can place unnecessary stress on the shoulders without providing additional benefit to the triceps.