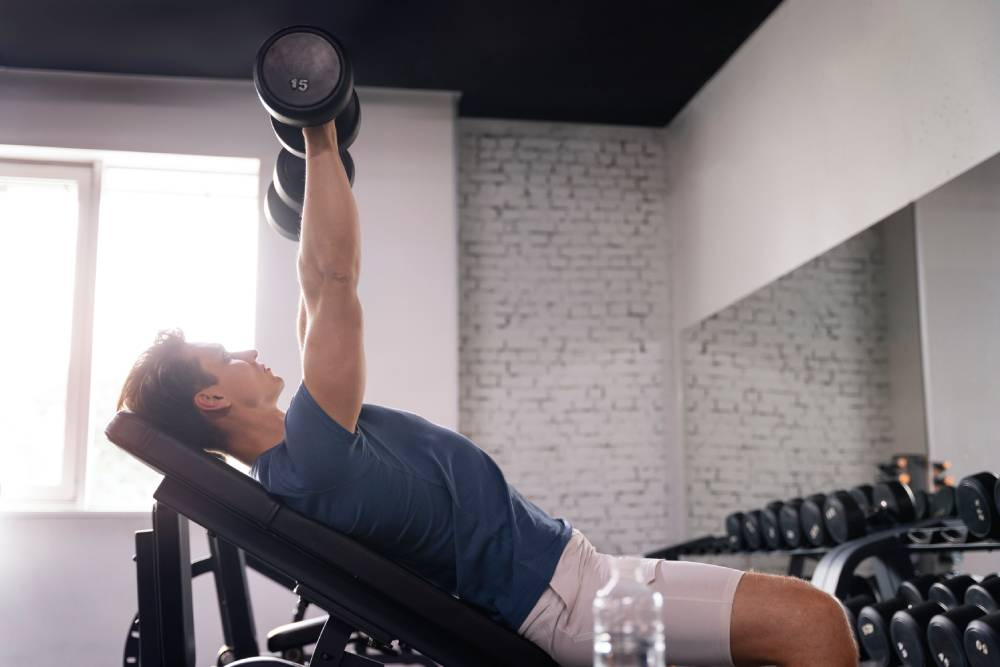
The incline press is a great middle ground between the overhead and traditional bench press. It primarily targets the upper (clavicular) portion of the pectoral muscles while also engaging the shoulders (delts) and triceps throughout the movement. One key advantage of the incline press is that it’s easier on the lower back than the overhead press, as the supportive bench stabilizes the lumbar spine, reducing strain. Additionally, the incline press limits the ability to “cheat” by arching or bridging, as seen in the bench press, making it a more honest and controlled exercise.
History of Equipment in the Incline Press
The equipment used for the incline press has undergone significant evolution, driven by the need for safety, convenience, and effectiveness. Early incline benches were generally rudimentary and often unreliable. These early models were not very sturdy and lacked attached racks to hold the barbell, making the setup cumbersome and sometimes risky.
Without dedicated racks, lifters had two options: either have a spotter hand them the weight, or they would clean the barbell from the floor, sit down, and then lay back into position for the press. For the latter group, getting rid of the barbell was equally challenging, often requiring the lifter to front squat the bar back up or wrestle it down to the floor after the lift. Due to these challenges, dumbbell incline presses became more popular during this period, as they were easier to manage without specialized equipment.
Early commercial gyms featured a different style of incline bench known as the “standing” variety. These were similar to elongated sit-up boards set at an angle, with the lifter positioned along the incline supported by foot-holds at the bottom. These benches were often paired with rickety squat stands for holding the barbell. If the lifter missed a rep, they could stand up quickly and manage the barbell by wrestling it to the floor, though this was still far from ideal. Despite the availability of these incline benches, dumbbells remained a popular alternative due to the limitations of the equipment.
Over time, incline benches evolved into the more stable and safer versions we see in modern gyms today, often equipped with integrated racks for easy loading and unloading of the barbell, making this exercise more accessible and secure for lifters of all levels.
How Much Incline?
When it comes to incline presses, the degree of incline is a critical factor that can significantly influence your results. The angle you choose will determine which muscles are activated and to what extent, impacting both strength gains and muscle hypertrophy. Each slope hits the muscles at different angles, emphasizing various parts of the chest and shoulders. The right angle will depend on your goals, biomechanics, and preferences.
Muscle Activation at Different Inclines
Lower inclines, such as 15 to 30 degrees, tend to target the upper portion of the pectorals more directly, engaging the anterior deltoids to a lesser extent. These lower angles are popular among bodybuilders looking to emphasize the upper chest and create a fuller, more balanced appearance. A lower incline also less taxes the shoulders, which makes it an excellent option for those dealing with shoulder issues or trying to minimize shoulder involvement.
Moderate inclines, around 45 degrees, offer a more balanced approach, distributing the work across the upper chest, shoulders, and triceps. This angle is commonly recommended for those wanting to develop chest and shoulder strength without overly taxing one muscle group. It’s also a comfortable angle for many lifters, offering a good balance of shoulder and chest activation without too much strain.
Higher inclines, ranging from 60 to 75 degrees, shift the focus more onto the shoulders (deltoids) and less on the chest. At a 75-degree incline, you perform a seated overhead press, which primarily targets the shoulders. These higher inclines are often used for shoulder-focused training rather than chest development, though the upper chest will still receive some stimulation. The risk with higher angles is that the more vertical the bench, the more pressure is placed on the shoulder joints, which could lead to discomfort or injury for some lifters if proper form is not maintained.
Seated Incline Benches: A Practical Evolution
The long, flat incline benches of the past were cumbersome, hard to adjust, and often lacked stability, which made it difficult for lifters to fine-tune the angle. This led to the development and popularization of seated incline benches, which provided a more practical solution. These benches are shorter, more stable, and easier to adjust, allowing lifters to modify the angle based on their specific needs and goals.
Seated incline benches also tend to have better ergonomics, supporting the lower back more effectively and reducing strain on the lumbar spine, especially at higher angles. Lifters no longer have to worry about the awkward positioning or instability that came with older, longer incline benches. With modern incline benches, you can quickly shift between different angles—whether performing a shallow incline press for upper chest emphasis or a steeper angle for shoulder development.
Fixed vs. Adjustable Benches
Some incline benches are fixed at a specific angle, most commonly around 45 degrees. While this tremendous all-purpose incline works well for many lifters, having a bench that allows for adjustability offers more versatility in your training. Adjustable incline benches will enable you to modify the angle, usually between 30, 45, 60, and sometimes even up to 75 degrees, providing more options for targeting different muscle groups.
Safety Considerations for Adjustable Benches
While adjustable benches offer flexibility, it’s crucial to ensure the bench is stable enough to support your lifting weight. Many home-use adjustable benches are designed for lighter loads and may not be suitable for heavy lifting. A sturdy, well-built mechanism is essential to ensure that the bench does not collapse under the combined weight of your body and the barbell.
When selecting a bench, particularly for home gyms, it’s worth investing in a commercial-grade adjustable incline bench with a robust locking mechanism. If you’re serious about lifting, you need a bench to support your training safely. A collapsing bench disrupts your workout and can cause serious injury, especially when heavy barbells are involved. The bench should have a solid frame, non-slip padding, and a robust and reliable adjustment mechanism that locks securely at each angle.
Modern Equipment
Seated incline benches have come a long way in design and functionality, but they are not without their issues. One of the main concerns is the variability in the features that different models offer. For example, some incline benches have built-in racks for holding the barbell, while others do not. Even when racks are included, they may not be adjustable in height, which can be a problem if the preset height does not suit the individual user. Similarly, some racks are adjustable in width, but this feature is rare, and most lifters compromise bar placement and comfort.
One of the most frustrating issues with modern adjustable incline benches is that many are designed primarily for flat bench pressing. When inclined, the barbell can often end up positioned too far behind the lifter’s head, making it difficult or even unsafe to unrack the bar. In these cases, the built-in racks become practically useless for incline pressing, as the setup does not allow for a smooth or ergonomic lift-off. This forces lifters to awkwardly reach the bar or enlist a spotter to start their set.
Rackless Benches and Power Racks: A Better Solution
One alternative to these problematic incline benches is using a rackless bench with a power rack. While a rackless bench may seem inconvenient at first glance, pairing it with a power rack offers more flexibility and control over the setup. The adjustable saddle heights of the power rack allow lifters to set the bar at the optimal height for lift-off, which can be particularly helpful if the lifter has short arms or prefers a specific grip width. The bench can be moved forward or backward within the rack to suit the individual’s needs, offering a more customizable and comfortable setup.
Power racks also have built-in safety features, such as adjustable safety bars. When doing incline presses, these bars can be positioned just below the upper sternum level, providing a safeguard in case the lifter fails to complete a rep. This safety mechanism eliminates the need for a spotter and gives lifters more confidence to push themselves during heavy sets, knowing that the bar won’t come crashing down on them in case of a failed lift.
Advantages of Using a Power Rack
Height and Width Adjustability: Unlike fixed incline benches with limited options, a power rack allows for complete customization of bar height. This is crucial for lifters of different sizes and arm lengths, ensuring that everyone can find a comfortable and ergonomic position for lifting.
Safety: The adjustable safety bars in a power rack are one of the most essential features for any lifter, especially when training alone. By setting the safety bars at the correct height, lifters can safely attempt heavier weights without the risk of being pinned under the bar.
Flexibility in Movement: A rackless bench can be moved forward, backwards, or even angled slightly within the power rack to find the optimal position for incline presses. This flexibility is impossible with fixed or poorly designed adjustable benches, which limit the lifter’s control over positioning.
Versatility: Beyond incline presses, a power rack offers a versatile solution for other exercises such as squats, overhead presses, and deadlifts. Combining a rackless bench with a power rack gives you a highly functional and adaptable setup for various lifts.
The Downsides of Modern Incline Benches
Despite their prevalence in commercial gyms, modern incline benches with built-in racks can often be a source of frustration. Their lack of adjustability, particularly regarding the placement of the bar, can make them impractical for many users. These benches can feel limiting and uncomfortable for shorter, taller lifters or those who prefer a specific grip or lifting style. Additionally, the lack of safety features such as adjustable safety bars means that lifters are often reliant on spotters or forced to take unnecessary risks when attempting heavy sets.
Another issue is the sturdiness of some home-use adjustable incline benches. Many are not built to handle the heavyweights that more serious athletes use, and cheaper models may become wobbly or even collapse under significant loads. This poses a severe safety risk, especially for those who train alone.
The Lift: Mastering the Incline Press
It’s time to tackle the incline press once the equipment is ready. Lifters new to the incline press will quickly notice that the movement feels more challenging than the flat bench press. This is due to the increased involvement of the shoulders and upper chest and the more limited “pressing groove,” or range of motion, which is narrower front-to-back depending on the incline angle. As the degree of incline increases, this groove becomes tighter, making it challenging to position the bar both during the un-racking and pressing phases of the lift.
This setup affects the lift in two key ways:
Un-racking Difficulty: It’s challenging to un-rack the bar without generating a rearward moment arm—this is the distance from the body to where the bar is un-racked, creating leverage that makes the bar feel heavier than it is.
Bar Path Precision: On the way down, the pectorals naturally want to push the bar forward, which increases the moment arm and puts additional stress on the shoulders and chest. Keeping the bar too far back, closer to the face, may result in hitting the rack or saddles during re-racking. Therefore, mastering bar path precision is crucial to avoid unwanted stress and to ensure a safe and successful lift.
The Set-Up
Before starting, take time to experiment with your equipment setup carefully:
Bench Angle: Adjust the incline to your preference (commonly between 30 and 60 degrees). Ensure it’s sturdy and the saddle heights and safety bars are aligned correctly.
Rack Positioning: The saddles should be positioned at a height that minimizes the moment arm when un-racking but still allows you to clear the rack during the lift. This helps avoid the awkward position where the bar starts too far back, which can make the un-racking process unnecessarily challenging.
Spotting
In most cases, spotting is not required when using a power rack with safety bars in place. The safety bars provide a fail-safe mechanism in case of a failed rep. However, a spotter may still be needed during the un-racking phase if the setup is awkward or the lifter wants added security. If no safety bars are present, spotting stands, or two competent end spotters are essential to ensure safety throughout the lift.
Grounding and Body Positioning
Good body positioning is critical to a successful incline press. While there are some differences from the flat bench press, much of the foundational technique remains the same:
Butt to Bench: Keep your glutes firmly on the bench to maintain stability and prevent tipping.
Blade Retraction: Squeeze your shoulder blades together to create a stable base for pressing. This helps protect your shoulders and ensures better engagement of the upper chest.
Hand Position and Grip: Choose a grip width that feels natural and allows for a comfortable range of motion. A slightly wider grip will target the chest more, while a narrower grip will shift some emphasis onto the triceps.
Leg Drive: Plant your legs wide and firmly on the floor. A solid leg drive helps stabilize the body and reduces any lateral bench tipping during the lift.
Tight Core: Engage your abs and back to create a strong foundation for pressing. This helps prevent lower back strain and increases overall control of the lift.
Mental Preparation
Centering: Begin your concentration routine. Clear your mind, focus on the task, and visualize the lift.
Charging: Take a few deep breaths, focusing on weight and movement. Prepare yourself mentally for the set.
Valsalva Maneuver: Before un-racking, brace your core by performing a Valsalva manoeuvre. This will help stabilize your torso and protect your spine.
The Lift
Un-rack: Carefully remove the bar from the rack and move it forward into the start position. Ensure the moment arm is minimized by not allowing the bar to drift too far back. Take another breath and brace your core before lowering the bar if necessary.
Lowering: Begin lowering the bar in a controlled manner. The target is the upper chest, typically near the top of the sternum. For those with longer forearms, the bar may need to “float” slightly higher to avoid awkward angles. Lifters can choose between a touch-and-go approach (lightly touching the chest before pressing) or a full pause (briefly holding the bar at the chest before driving upwards). Both techniques have advantages: touch-and-go offers more speed and rhythm, while a pause can build greater control and strength at the bottom of the lift.
The Drive: As you press the bar upward, aim to drive with enough force to pass through the sticking point, the hardest part of the lift where many lifters stall. Keep the bar close to your face to minimize the moment arm and avoid losing control. As you approach the top, resist the urge to slow down; maintaining momentum is critical to completing the rep successfully.
The Finish: Lock the bar out at the top of the lift to complete the rep. Maintain control of the bar, keeping your core tight and your grip firm. Repeat this process for as many reps as you’ve planned.
Re-racking the Bar
Once your set is complete, carefully guide the bar back into the rack. This is a crucial phase where many mistakes can happen, especially with the incline press. Remember that the moment arm still exists when returning the bar, so do not let it drift too far forward or backwards. Be mindful of your head position relative to the rack and safety bars—ensure that the bar is securely re-racked without hitting the sides or saddles. Missing the rack, especially with a heavy load, can lead to injury since your head is still under the bar, making this phase just as important as the lifting itself.

While more challenging than the flat bench press, the incline press offers significant upper chest and shoulder development benefits. By fine-tuning your setup, maintaining precise technique, and focusing on safety, you can master this lift and integrate it effectively into your training routine. Paying attention to the details—like minimizing the moment arm during un-racking and keeping the bar path controlled throughout the lift—will help you perform the incline press confidently and successfully.